Dave Holland
(K=13074) - Comment Date 2/10/2004
|
Most professionals rely on those rectangular graduated neutral density filters, to keep the depth of brightness within the five stops that most film/sensors are capable of handling. The Cokin holder system is pretty good, and you can use a hacksaw to cut off the outer filter holder, to allow use with a wide angle lens. Cokin filters have been good enough for my skill set, though I know others who prefer more expensive filter sets. Most fit the Cokin holder, however. I would probably get the larger 'P' range of filters, in case you decide later to buy larger lenses in the future. For sure get the rectangular adjustable system so you can move and tilt the filter to match the landscape. If you are doing landscape photography, a grad ND filter set is critical.
|
|
|
|

Joe Blow
(K=1918) - Comment Date 2/11/2004
|
Dave has given you good advice. The only other filter that may help you out is a linear or circular polarizer. You'll want to find out which type your camera takes.
|
|
|
|
Bob Tomerlin
(K=5460) - Comment Date 2/22/2004
|
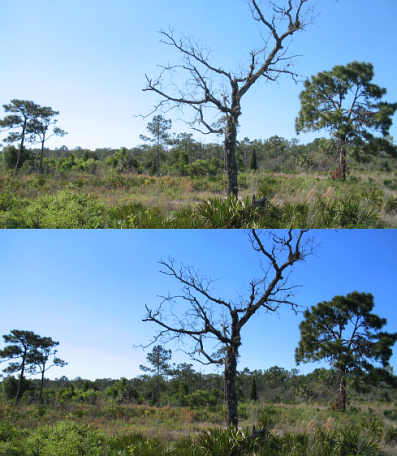
I second (or maybe third) Dave's advice. I looked at your portfolio, and the first picture you posted would benefit from a grad ND filter. With that filter, the contrast range between the shadowed foreground and the bright sky and treeline would have been reduced, allowing you to get more detail in the shadows.
|
|
|
|
anton albert
(K=291) - Comment Date 3/10/2004
|
Rebecca, I try to keep things as simple as possible! If at all possible, I try to shoot between 45 and 90 degrees to the sun. When you do this a polarizing effect happens. I don't know the reason but it does. This helps me out alot. If my subject is not positioned where I can get the polarizing effect, I go into Photoshop and use other sky photos that have the blue color that best represents what I'm after and combine layers. I hope this helps.
Anton
|
|
|
|

Bill Morgenstern
(K=7157) - Comment Date 3/14/2004
|
All answers you received are accurate so I'm sure if you apply this knowledge and filters your images will be the way you want them. Anton's advice is critical and often overlooked by photographers. We all need to be aware of the effect he describes and use it to our advantage. Next time you are out with great blue sky in front of you, turn around and see the difference behind you. Then look at varying degrees of blueness as you turn to face that bright blue sky. You will be able to decide what you are looking for after this observation. Good luck and keep shooting.
bill
|
|
|
|
Phil Monger
(K=296) - Comment Date 8/5/2004
|
http://www.davrodigital.co.uk/tutorials/polaried-look/polar-look.htm
will be useful for the pics taken before the filter, it works great
|
|
|
|

Kevin H
(K=22502) - Comment Date 10/11/2004
|
A ND Grad will help alot but what I find is the best solution, is the time of the day. Before 10am or after 2pm would be the best time as the light isn't as harch. If your taking some landscaping shots during the mid-day, the light is so harch, that it washes out your blue sky. That's when your ND Grad comes into play to try and correct that. Hope this helps.
|
|
|
|
Mark O'Brien
(K=1050) - Comment Date 12/14/2004
|
You didn't say whether you are shooting transparency or print film or digital. If prints, remember that the lab result may also not be optimized to reproduce what you saw, rather what the lab decides is best. I echo what others have already said abbout filters.
|
|
|
|

Peter Nettleton
(K=245) - Comment Date 2/8/2005
|
I will concur on the polarizing filter, I used that on my Frozen Hudson Shot, and I was able to keep both the river plus the sky blue.
|
|
|
|
D .
(K=1883) - Comment Date 4/16/2005
|
Try loading a washed out sky picture into an editing program, duplicate its layer, and set the upper layer to multiply mode. Turn down opacity since 100% is way too strong an effect. I find this gives unbelievably color drenched skies, enhanced cloud detail, and eliminates the need for polarizing filters. More multiply mode layers can be added on to exaggerate the look.
Multiplying will darken the landscape, so I'd recommend making sky and land adjustments separately then combining them with a linear gradient layer mask.
|
|

Sky before and after 4 multiply mode layers applied
|
|
Joe Johnson
 (K=8529) - Comment Date 4/17/2005
|
I think I'd echo the advice of those who say, get the filter at the scene. Put it there at the light source. And that might mean, in your case, no more than a CPL filter, a circular polarizer, of whatever thread size. But the gel or plastic filter holder is ideal if you have the time to setup. Plus you can experiment with 'slides' of your own. And you could always get a heavy Bogen (or whatever) tripod and try to shoot double exposure at different shutter speeds, then combine the composite in Photoshop. I think just the polarizer will probably fill your requirements.
|
|
|
|
Nuno Picado
(K=32) - Comment Date 4/22/2005
|
I've be using an ND 4x filter, and it's doing fine. Even so, for that job, I'd say an ND 2x would be better, but always using the Polarizer with it!
|
|
|
|

Patrick Ziegler
(K=21797) - Comment Date 5/2/2005
|
My simple rules.
1. Try to keep your back to the sun, In the northern hemisphere the northern sky is easier to expose than the southern. and visa versa in the souther hemispher. (if the light is wrong, I'll walk away from a shot and come back when it's better)
2. Use a circular polorizer. A graduated also will help. A circ. polorizer in sunglasses for your camera. Plus it make clouds look spectacular.
2. Expose for the sky. Meter the sky and your foreground. Make sure there is not too much contrast for your camera or film. If there is the definatly go to a grad ND or come back when there is better light. If the contrast is within a comfortable range then expose for the sky.
Good luck, I still burn a sky once in a while.
|
|
|
|
Patrick Ziegler
(K=21797) - Comment Date 5/2/2005
|
However, rules are ment to be broken....
http://www.usefilm.com/image/779195.html
|
|
|
|
Ryan Moss
(K=371) - Comment Date 5/18/2005
|
Rebecca, all these solutions work. I grad. filter is a much more powerful tool than the polarizer for this technique ( however I use a polarizer more than anything!!!!!!!!!!!) but they are pricy. Do you have photoshop? if you do than what I suggest is take 2 pictures on a tripod. Expose for the forground (ground) and take the 1st shot. Then, adjusting the SHUTTER SPEED (adjusting the F-stop will alter your depth of field) expose for the sky. Bracketing on both these shots will encrease your chances of a better end result. once you have both of these shots you can merge them in photoshop by layering the GROUND shot on top of the SKY shot and using the eraser to get rid of the bleached out sky of the GROUND shot. I usually use the mask tool and grad tool to creat a similar effect to a grad filter. All of my shots which include a sky and a forground have been done this way.
|
|
|
|
Ranjay Mitra
(K=733) - Comment Date 1/17/2007
|
I understand its a very old post, but I would like to add a point here. Overall, the need was to have a "bluer" sky, and the suggestions came for Grad ND & polarizers. the purpose of these 2 tools are different, although in some cases they will yeild the same result.
I suggest you use Grad ND to balance exp variations to bring out the subtel colors variations. As an example, your pic Thursday Evening" (http://www.usefilm.com/image/329033.html) & "Imagination2" (http://www.usefilm.com/image/330659.html) would have seen probably a little more subtle colors at the horizon if you had used a Grad ND. A polarizer wouldnt have been much helpful when the lens is aligned with the sunrays.
Since polarizers have the max effect when used at right angles to the sunlight, your picture "late summer field" (http://www.usefilm.com/image/301345.html) would have seen a "bluer" sky if used with a polarizer.
principally, a Grad ND "darkens" a picture by allowing less light to hit the film, while polarizer would "darken" a picture by allowing only one small set of unidirectional light to hit the film. Because it works best when used at right angles to the sun, or when there are reflective subjects, polarizers have limited use.
from your gallery, I guess you enjoy doing impressionistic images too. You could try sandwiching slides too for enhancing / washing out colors. hope this helps a little.
Cheers.
|
|
|
|
Chris Mathers
(K=197) - Comment Date 4/11/2007
|
I have found a trick for making the sky very blue when shooting sunsets and rises but am not really sure why it happens. Any help? Is it just the meter reading off the sun and darkening the whole image?
|
|

Blue skies smiling at me!
|
|
Robert Chin
(K=22282) - Comment Date 4/20/2007
|
Great thread with excellent postings all round.What works for my IR
images is -ev compensation but that`s more for controlling overexposure of the clouds.
|
|
|
|
Lawrence Smithers
(K=5) - Comment Date 11/4/2008
|
Hi Rebecca: You might want to consider Ansel Adams method for solving this kind of problem. Although he designed his approach for B&W it has been adapted for colour transparency by many profesionals.
For B&w Ansel used 9f stops 1 being detailess black , 9 being specteral white. Blue sky on a bright day falls on zone 6 close to 7
Zone 5 is photographic grey as read from a grey card.
For color positive he used 5 and1/2 stops from black shadow to specteral white. Photo grey is zone5 and blue sky is high 6.
You shoud take meter readings of photo grey ,blue sky ,deep shadow and any other significant tones and place each on its appropriate zone and f stop. If your sky was blue then it will be blue on your transparency.
|
|
|
|
Goutham Ramesh
(K=52) - Comment Date 11/19/2008
|
Hi, Using a good polarizer filter will help. I had some success shooting with polarizer.
Regards,
Goutham
|
|
|
|
April Andy
(K=50) - Comment Date 10/20/2009
|
well just keep the depth of brightness within the five stops that most film/sensors are capable of handling.
|
|
|
|
Mary Pond
(K=15) - Comment Date 8/3/2017
|
I agree with other comments, a lot of great solutions. Personally I don't know what to suggest, I just can tell that on Weedit.com there are a lot of hacks and tips .that may help)
|
|
|
|